Refining My Bread-Baking – Winter 2010 Catalog
Refining My Bread Baking Heritage
By Stephanie Kuvik Tallent

I remember one special day when I was eight as if it was yesterday. My siblings and I gathered in the kitchen as Mom taught us about wheat. As homeschoolers, we learned a lot about nutrition and health because Mom routinely researched this passion of hers.
That particular wheat day, Mom explained to us the difference between white and wheat flour, pointed out the sundry parts of the wheat berry, and showed where they’re located. We learned about wheat germ, wheat bran, and how to tell the difference between the two. We examined oils in the berry and saw that once the wheat berry was ground, oil covers each speck of flour and can cause the flour to go rancid if not used soon after grinding (that’s what causes many of us to dislike the flavor of foods made from whole wheat flour bought from the store). Mom taught us about soft wheat and hard winter wheat -why they’re hard or soft and whether to use the flour made from each berry for pastries or bread. She taught us about corn, lentils, beans, rye, and oats, too, but I especially remember what we learned about wheat, probably because bread was such a regular part of life for us.
Mom made bread as often as she could from the best flour she could find, but because of what she knew about flour and wheat, she wasn’t satisfied with that. She knew the best bread would come from freshly ground flour, and she couldn’t wait to get a mill of her own.
Mill Day and Beyond
The Christmas that Dad gave Mom her long-awaited grin mill was one we all remember well. The new mill was the key that would turn her bread from something we didn’t always like inot a delectable art.
Dad grinned his “I can’t wait to give you your gift” grin for weeks before Christmas in anticipation of Mom’s surprise and pleasure. Dad and I reveled in the fun of trying to hide from Mom in her own room while wrapping the mill and a bucket of wheat berries to go with it. And none of us were disappointed by her reaction. The first thing Mom did was to read the manual from the mill from cover to cover to make sure she knew the ins and outs before using it even once. Then we all watched as Mom fired it up for the first grind. Wow! Was it ever loud! But, airplane sound and all, we watched as that wonderful machine took the wheat berry we all knew so much about and ground it into the freshest flour we had ever seen.
After that, Mom made bread just about every day, and we consumed loaf after loaf of her light fluffy specialty. Often it would be warm and fresh just in time for lunch. Oh, those morning school hours at the dining room table were torture smelling that wonderful bread baking. We could eat a whole loaf when it was warm, spread with butter and honey. Yum!
Thankfully, Mom didn’t just make bread, she also taught me how to make it. I learned that, when mixed just right, the dough should feel like a baby’s bottom. I discovered how to troubleshoot a recipe and figure out what changes to make it better the next time. I learned how long to raise it, how long to bake it, and how thick to slice it so that the bread didn’t dry out in Dad’s sandwiches before he got to eat them at lunchtime.
But after a while, we became aware of something strange. Mom and I noticed it was hard to eat a sandwich, not because the bread wasn’t tasty, but because it would sour our stomachs for hours after eating something that should have digested properly and been nourishing! We often chose not to eat our wonderful homemade bread because we knew it would ruin the rest of our day. Wondering what was going on with our bodies that we couldn’t enjoy the bread we knew was so healthy, I began to think we had developed an allergy and went on a search for an answer.
Improving the Legacy

Mom went to be with Jesus last year after Thanksgiving following a four-year battle with cancer. It has been a bittersweet time since then, filled with a lot of memories, but it has not been a year without its blessings. In particular, I’ve learned something new and exciting about bread. I now have a copy of Nourishing Traditions by Sally Fallon (Nourishing Traditions can be found on page 14) and in reading this wonderful informational cookbook, I learned that if you soak flour in an acidic liquid overnight, it starts the process of breaking down proteins in the bread that make it more digestible. This profound, simple key has changed my bread-baking forever. And guess what? I can eat the bread made from flour soaked overnight without getting that familiar sour stomach! What a difference in how I feel!
A few months ago, my sister and I were catching up on our daily lives, and I mentioned that I was soaking the flour for my bread these days, explained what a difference it was making in how I feel, and shared that my sour stomachs were a thing of the past. She paused to think about what I had said and told me how happy she was that I discovered this “new” information and could make bread for my family this way. Then she said something that made me smile: “You know, if Mom had discovered that, she would have been all excited about it and sharing it with us.” My sister was right. Mom would have been excited about her find and would have encouraged us to perfect our bread in this new way.
Two days after that phone conversation with my sister, I was at my Dad’s house helping him go through Mom’s belongings and decide who would like to have what, who has special memories of which items, and who Mom would have liked to continue to enjoy each thing. As Dad and I organized what was on her desk, Dad discovered recipes and handed the book to me. I glanced through Mom’s notebook and was stunned to see that it was full of information and recipes about soaking flour overnight before making bread-and about soaking other grains before eating them!
I stood in shock as the realization hit me that Mom had already discovered my “new” information. She just hadn’t gotten a chance to start making her bread this way and to share it with my sister and me before she got sick. What wonderful confirmation to me that this method of making bread was the right direction!
Mom taught me all about making bread and knew more than she even had a chance to tell me. I took that knowledge into my marriage and began making bread for my own family. Thanks to her, I’ve felt like a successful homemaker doing the things every housewife should do to nourish my family in a healthy way.
Now I think of Mom each time I make bread-and I smile. I remember the hours we spent in the kitchen grinding fresh flour, making bread, and other good things, and I wish I could give her a slice of my fresh, warm, soaked-flour bread. Knowing she was headed toward this new bread-making method drives me harder to perfect each loaf and make it a delicious success for my family. When it comes out right, I smile and say, “Thanks, Mom.”
Yeasted Buttermilk Bread Recipe:
4 cups freshly ground hard winter wheat
1 ½ cups buttermilk, warmed
½ cup extra virgin coconut oil, melted
¼ cup warm water
1 Tablespoon dry instant yeast
2 Tablespoons blackstrap Molasses
1 tsp. Salt
½ tsp. Baking Soda
1 cup unbleached organic white flour
Combine whole wheat flour, buttermilk and coconut oil in mixer. Dough should not be sticky. If needed, add a bit more flour. (A key you have the right mixture is if the sides of the bowl are clean.) Form a ball and place in the bowl, cover with cheesecloth and leave in a warm place overnight. (12-24 hours).
In the morning, combine water, molasses, salt, and baking soda in a measuring cup and mix well. Add instant yeast and cup of white flour directly to the dough and pour wet ingredients over top. Mix until it is smooth and sides of bowl are again clean. Your dough should not be tough, it should feel “soft as a baby’s bottom”, as Mom would say. Form a nice ball and again place your dough back into the bowl and cover with cheesecloth. Allow it to rise for about 2 hours or until it had doubled in size. Punch dough down, knead it for just about a minute, cut it in half and form each half into a log the size of your bread pan. Place in greased bread pan, cover with a cheesecloth and let shaped dough rise in a warm area for another 1-2 hours, or until doubled in size. Bake for 30 minutes at 350 degrees. Gently cool and be sure to enjoy a warm slice.
*Note: This is Stephanie’s adapted version. For the original recipe see page 493 of Nourishing Traditions
My Bread-Making Steps: (pictures for these steps can be found on page 45 of the catalog or on the following link Winter Catalog 2010)
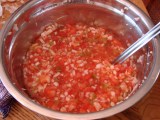
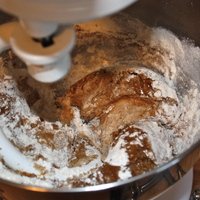
Step 1: Soak your flour with buttermilk and coconut oil or butter. I warm my buttermilk and melt the coconut oil together on the stove and then dump them into the mixer where I have my flour measured out.
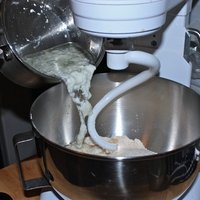
Step 2: Then I mix the buttermilk, coconut oil and flour together.

Step 3: Scraping the bowl to make sure it is all mixed.

Step 4: Getting the unleavened dough out of the bowl to knead it a bit.

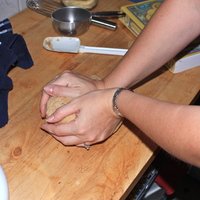
Step 5: Hand Kneading
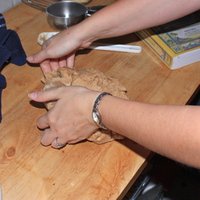
Step 6: Kneading
Step 7: Place the kneaded dough back in the mixing bowl and cover with cheese cloth to culture/soak overnight.

Step 8: In the morning, add the rest of the ingredients and your yeast and mix like you would any other bread recipe.
Step 9: Mix and knead.

Step 10: Starting to look like bread dough.
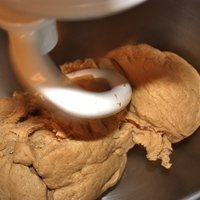
Step 11: Ball of dough before the first rise.

Step 12: First Rise. NT recipe says to let this take about 2 hours or until it doubles in size.

Step 13: Shaped and in the pans for second rise.

Step 14: Into the dehydrator for second rise. You can also do this at room temperature or a low temp oven, but I have found it goes quicker in a warm space.

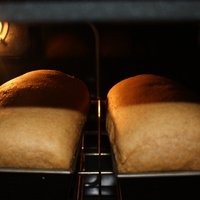
Step 15: Second rise complete and into the oven it goes for 30 mins at 350 degrees.
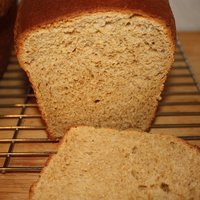
Step 16: 2 beautifully baked loaves.
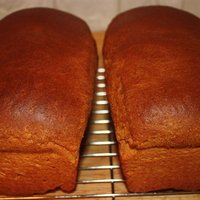
Step 17: Inside texture is perfect! Slather with fresh butter and eat warm!!
Stephanie Kuvik Tallent is part of the Beeyoutiful Customer Service team. Her duties include moderating and researching for Beeyoutiful’s health forum, MerryHeartMedicine.com, helping take your phone orders and other projects that need a hand. Stephanie currently lives in Missouri with her husband, Paul Tallent and is Mom to Amanda and Michael. She spends her time in her kitchen experimenting with the recipes of Nourishing Traditions. The Winter months find her snuggling with her family in front of the fire, sipping a cup of tea with her computer close by.